Article from The
Master Gardening Bench, Manatee County Master Gardener Newsletter
by John Dawson
Maintaining Your
Garden Tools
"If you take care of
your tools they'll take care of you,"
is an old and proven saying. The secret to having garden tools you can
count on year after year is to buy the best quality tools you can
afford and then maintain them. If you do those two things, your
children and grandchildren will be using your garden tools long after
you've stopped gardening.
The main enemies of all garden
tools are moisture (causes rust), improper use, and poor or inadequate
maintenance. To keep your gardening tools around for a long time:
Clean your tools after each use and put them away where they belong.
Store your tools off the ground in a dry place. Remove any rust that
forms on a tool and coat with oil.
Keep wooden handles smooth by sanding and oiling them.
Spray fiberglass handles with a clear enamel to prevent
fraying.
Keep cutting edges sharp and moving points oiled.
Use the right tool for the job. Use the tool as it was
intended.
Replace/repair badly damaged tools.
All
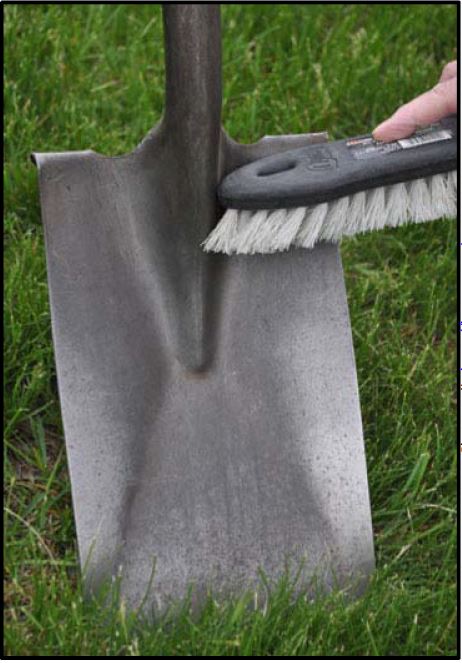
tools must be clean before sharpening. Knock off all dirt, wash, rinse,
and wipe dry. Use steel wool, a wire brush/wheel, SOS soap pads, or
light sandpaper to scour blades of rust. Scissors, snips, shears, mower
blades, pruners, and loppers are all sharpened the same way. If
possible, disassemble the blades and secure in a vise.
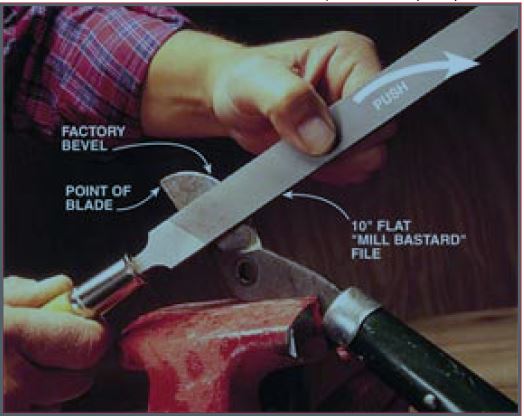
Once
removed, the cutting blade edge can be sharpened using a flat bastard
file, whetstone, or even a kitchen knife sharpener. Always file in one
direction away from you. Adjust your angle as needed to file the entire
edge evenly on the factory bevel; usually 10 strokes will expose clean
metal over the entire edge.
Then do the same with the other
blade, and never use small jerky strokes because it will cause you to
lose the factory edge. The flat edge, where the blades come together,
should be filed or sanded to remove any burs. Using 300 wet/dry
sandpaper or a honing stone, keep the blade flat and file/sand in a
circular motion and check for burrs. When burrs are smoothed out,
lightly oil all surfaces of the blades, and reassemble the tool.

Fig. 1. Proper sharpening technique
When
sharpening a shovel (yes, it is a cutting tool) you only need to
sharpen the upper edge of the shovel. A straightforward way to do this
is to fasten the shovel into a large vise with the head near the vise
and facing up.
Start at one side of the shovel base and holding
a bastard file at a 45‐degree angle to the edge of the shovel and
pointing inwards towards the center, make four or five even strokes
inward and upward. Step your file an inch or two towards the tip and
repeat the motions until you get to the tip of the shovel. Repeat for
the other side.
Sharpen hoes the same way. Hatchets and axes need to
have both sides of the blade sharpened at a 45‐degree angle. Saws,
chain saws, and powered hedge trimmer blades require special handling
and different files to maintain a factory bevel and the technique is
too complicated for this article.
All metal tools should
be cleaned and oiled before storage. I prefer to use WD‐40; not only
does it penetrate and lubricate, it also displaces water. The WD
actually stands for Water Displacement.

Fig. 2. Properly clean your tools after each use
The
wooden handles of rakes, hoes, picks, axes, and shovels need
maintenance as well. Over time, the wood will dry out and begin to
splinter. Sand the handles with medium grade sandpaper (100‐180 grit)
and then rub with linseed oil. The linseed oil keeps the handles from
drying out and splintering. Replace any handles that are cracked or
badly splintered.
Fiberglass handles wear out as well. They fray and leave tiny
glass splinters (another good reason to wear gloves).
Lightly sand with a fine grade sandpaper (300 grit), wipe
with a damp cloth, and then spray with a clear enamel.
Back To
Fruit
General Page
Vegetable
General Page
|
|