Grafting methods
by Wally Ganmor, hibiscusworld.com
Bark
or Rind Graft
This method of grafting is rapid and gives a high percentage of success
if properly done. It can be used on branches from 1 to 6 inches in
diameter. Follow these points: 1) Rootstocks must be actively growing
as this graft depends upon separation of bark from the wood. This
occurs in spring. Dormant scions are required so winter collection and
storage is necessary. 2) Scions are made with a long sloping cut (1 to
2 inches) on one side and a shorter cut (1/2 to 1 inch) on the opposite
side. Slant the shorter cut to conform to the slope of the bark on the
stock. The side with the longer cut will be placed next to the wood of
the stock to get cambial contact.
So often, a hybridizer gives you a piece of wood and asks you to graft
it (when you learn how) hoping to get the plant back if he/she loses it
for whatever reason. If it's a thin piece, this technique is a
lifesaver. Thin rootstocks are not always successful. Thicker ones have
a much better take rate for me...almost 100%.
This time, lay the knife along the bark as shown and gently push all
the way in to the "wood". With a gentle twist each way the bark is
lifted from the wood. (Go opposite the existing node for one graft, or
one-quarter each way and make two slits to insert two.)
Cut the scion with a long flat cut from side-to-side. Back trim a
little ledge on the back side to slide under the bark more easily. Now
trim just a fine whisker down each edge to bare the cambium sap line to
better connect with the flow. 1
Here is a picture sequence which may help give the idea.
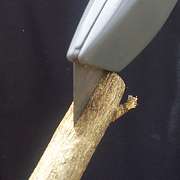
Gently cut to wood |
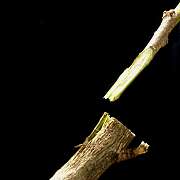
Lift the flaps
|
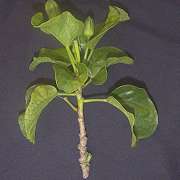
The thin one
|
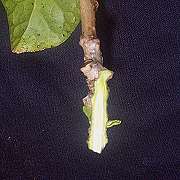
Long "wedge"-type |
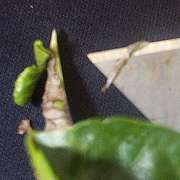
Edge close-shaved |
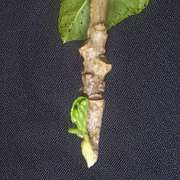
Bit more trimming |

Ready to insert
|
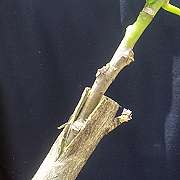
Ready to wrap |
Sequence Rind or Bark Graft
Bark grafting is used primarily to top work flowering and fruiting
trees. In contrast to cleft grafting, this technique can be applied to
rootstock of larger diameter (4 to 12 inches) and is done during early
spring when the bark slips easily from the wood but before major sap
flow. The rootstock is severed with a sharp saw, leaving a clean cut as
with cleft grafting.
Preparing the Stock: Start at the cut surface of the rootstock and make
a vertical slit through the bark where each scion can be inserted (2
inches long and spaced 1 inch apart). Preparing the Scion: Since
multiple scions are usually inserted around the cut surface of the
rootstock, prepare several scions for each graft. Cut the base of each
scion to a 1 ½- to 2-inch tapered wedge on one side only.
Inserting the Scion: Loosen the bark slightly and insert the scion so
that the wedge-shaped tapered surface of the scion is against the
exposed wood under the flap of bark. Push the scion firmly down into
place behind the flap of bark, replace the bark flap, and nail the
scion in place by driving one or two wire brads through the bark and
scion into the rootstock. Insert a scion every 3 to 4 inches around the
cut perimeter of the rootstock. Securing the Graft: Seal all exposed
surfaces with grafting wax or grafting paint. Once the scions have
begun to grow, leave only the most vigorous one on each stub; prune out
all the others. Bark grafts tend to form weak unions and therefore
usually require staking or support during the first few years. 2
Further Reading
Bark Grafting Pecans from the Oklahoma State University, Cooperative Extension Service pdf
Back to
Grafting Techiques Page
|
|


